Van · Kia PV5 · Electric camper
An electric van, fitted out at home
A Kia PV5 electric van that I'm fitting out myself to sleep in, and measuring closely: consumption, charging, real costs. The figures on this page come from the van, not from the brochure.
Updated
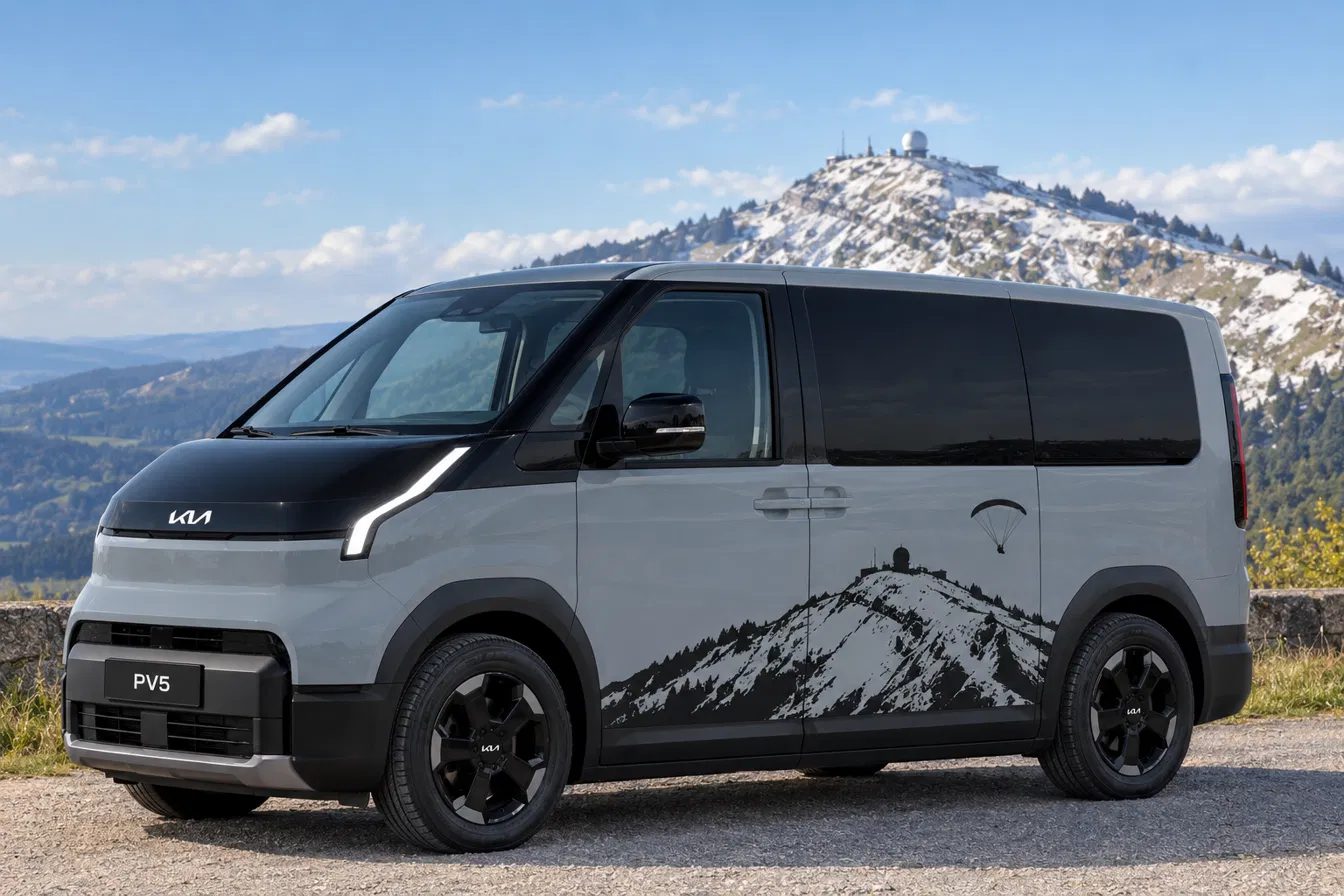
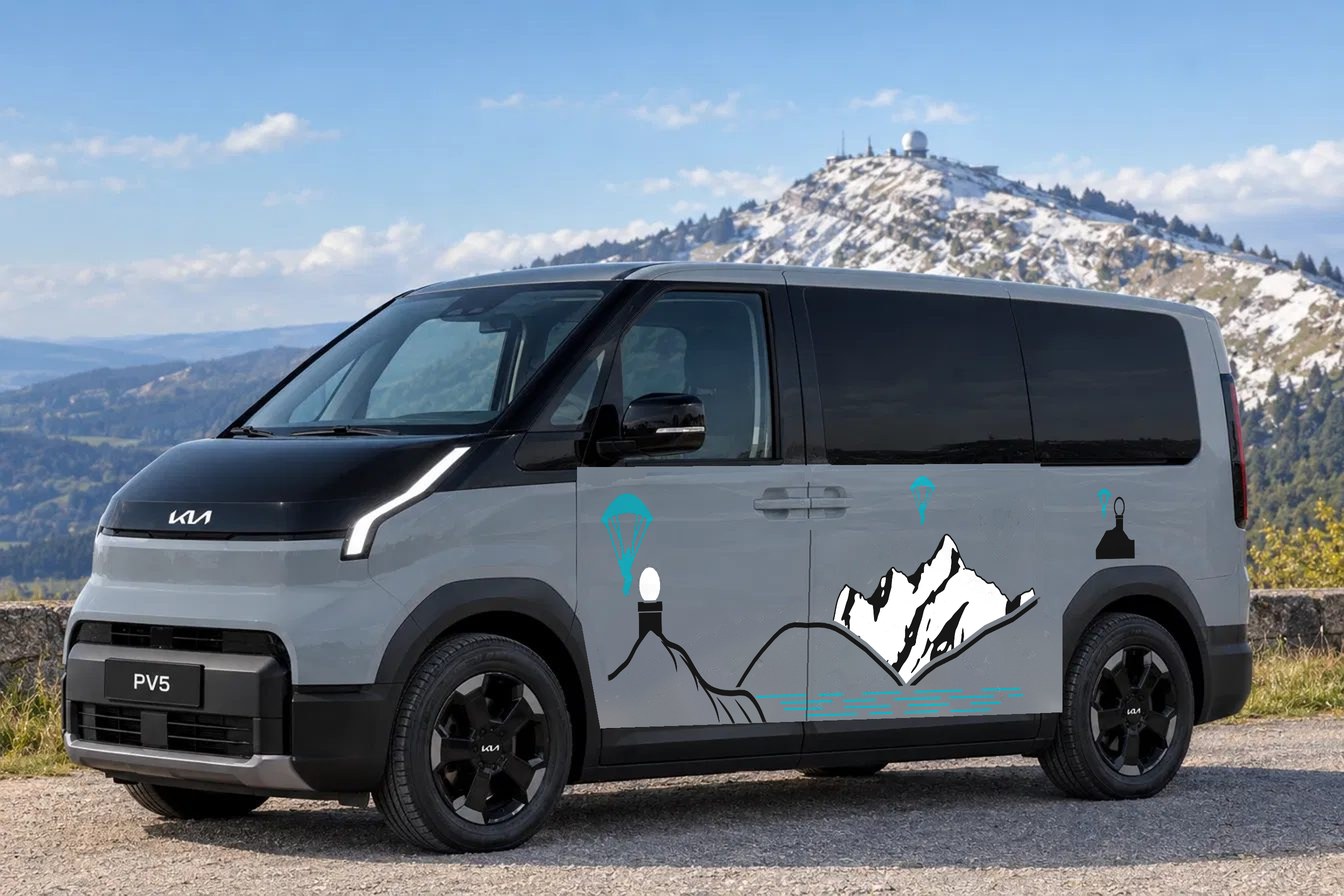
An old dream, finally reasonable
I've wanted a van for a long time. But a combustion van was too expensive to run and far too much CO₂ for me: a big diesel for weekends away was something I couldn't justify.
So for three years I made do with car sharing, on top of a Swiss rail pass and my bike. It was the greenest and the cheapest option. But with my daughter growing up, and wanting to get back into outdoor sports, skiing and paragliding, it was getting complicated.
An electric van changes the equation: energy is cheap, maintenance next to nothing, and over its life it emits far less than a combustion one, battery manufacturing included (see the ICCT life-cycle analysis). And batteries are now big enough, and charging fast enough, to travel far without thinking about it.
Of course, cycling and public transport remain the better option, and I keep using them. But they don't fit every lifestyle: with a child, paragliding gear and dawn starts to take-offs no bus reaches, sometimes you need a vehicle. It may as well be as frugal as possible.
Measured consumption
The van reports to a small server I wrote: every trip, every charge, the battery's state. Over the first three weeks, 1,360 km from 30/09/2026 to 20/10/2026:
| Kind of trip | kWh/100 km | Range |
|---|---|---|
| Short trips, town and country roads | ≈ 19 | ≈ 370 km |
| Average of all trips | 21.3 | ≈ 330 km |
| Motorway at 120 km/h | ≈ 25 | ≈ 280 km |
On a motorway trip you'd rather charge between 10 and 80 %: that makes legs of about 200 km, roughly two hours of driving, the right moment for a break. On country roads at 80 km/h, it goes past 350 km.
What matters is speed, not weight. In a combustion car, every time you brake the energy of motion turns into heat in the discs: it's gone. In an electric one, the motor brakes by charging the battery. Coming down the Jura or stopping at a light now costs only a small efficiency loss, instead of all the energy. So the van's mass, and what you load into it, barely change the consumption, and the brakes hardly wear. At high speed, though, air resistance dominates, and a van is shaped like a wardrobe: hence the gap between 19 and 25.
What 100 km costs
My building bills charging at an absurd price: 0.60 CHF/kWh at the car park's charger, even when it's our own roof's solar supplying it. We're trying to get that changed. Even at that price, electric is still cheaper than a diesel van.
| Charging | CHF/kWh | CHF/100 km |
|---|---|---|
| VW California diesel, for comparison | — | 14.30 |
| My building's charger, today | 0.60 | 13.20 |
| Fast charging on the road | 0.55–0.70 | 12–15 |
| Household tariff, 80 % off-peak | 0.28 | 6.10 |
| Your own solar panels | ≈ 0.10 | ≈ 2.20 |
The household tariff is the one on our flat's electricity bill in Nyon: 26.4 ct off-peak, 32.2 ct peak. 80 % of the charging at night and on weekends is what a car sleeping in the garage does without trying. My real cost in October, with the expensive charger and a few fast charges on trips: 11.90 CHF/100 km.
With solar panels on your own roof, it gets much better still: charging from your own surplus costs only what the grid would have paid you for it, often under 10 ct a kWh. 100 km for about 2 francs, with energy made a few metres away.
Besides energy:
- Maintenance: a service every 2 years or 30,000 km. No oil change, no clutch, no timing belt, and brakes that barely work thanks to regeneration. The real wear item is tyres: about 1.75 ct/km.
- Taxes: in the canton of Vaud, a new electric car pays no vehicle tax for its first two years (in French), then a heavily reduced one. The motorway vignette remains, 40 CHF a year.
- Insurance: 990 CHF a year, the largest fixed cost.
Charging on sunshine, automatically
The PV5 has an API: you can read the battery's state, start and stop a charge, set the charge limit or schedule the heating remotely. That's enough to automate a lot.
A small server runs all the time. It follows the van, and it also connects to the building's solar data: live production from the roof's 128 kWp, and the forecast surplus for the day and the week (see the building automation). It only starts charging when the roof makes more than the building uses, and stops when the surplus goes. The rest happens at night, off-peak.
Of course the system can always be bypassed: if I have to leave tomorrow morning with a full battery, one button does it.
Going far: fast charging
What changed in the last few years is that batteries became big enough, and charging fast enough, to travel. The PV5 charges at up to about 125 kW on a fast charger: around 25 minutes to get half the battery back, the time for a coffee and a leg stretch.
Measurement to come: the real charging curve, 10 to 80 %, on a 150 kW or faster charger.
Camping with 71 kWh under the floor
For camping, a 230 V socket on a huge battery makes everything simpler. No leisure battery, no roof panel, no gas stove: plug in an induction hob, a heater, a laptop, whatever you like. An evening of cooking and computing uses a handful of kWh, a few percent of the battery.
Heating at night with the heat pump
The van's heat pump can also heat or cool the cabin all night, far more efficiently than an electric heater. In "utility" mode I measured about 280 W of air conditioning in mild weather. The rough figures I found for a cabin this size: 0.3 to 0.7 kWh an hour depending on the cold, so 3 to 7 kWh for a 10-hour night, 5 to 10 % of the battery.
Measurements to come: the real consumption of a heated winter night, and of a cooled summer night.
The 230 V socket (V2L): 400 W just to stay awake
As long as the V2L socket is on, the van stays awake: high-voltage battery connected, inverter, 12 V converter and control units running. The ADAC measured this self-consumption on six electric cars: 390 to 500 W depending on the model, 390 W on the Kia EV5 (ADAC V2L test, in German). It comes on top of whatever is plugged in, even a phone charger.
For cooking, that's negligible: an induction hob draws 2 kW for half an hour, and the van's 400 W are a small part of the bill. For a small appliance left plugged in, it's the other way round. A fridge that uses 30 W on average:
| Fridge on the V2L socket | W | kWh/day | Battery |
|---|---|---|---|
| The fridge itself | 30 | 0.7 | 1 % |
| The van, keeping the socket on | ≈ 390 | 9.4 | 13 % |
| Total | ≈ 420 | ≈ 10.1 | ≈ 14 % |
Over 90 % of the energy goes into keeping the socket on, not into cooling. A three-day weekend with the fridge plugged in all along costs 40 % of the battery.
Better to switch the socket on only for the big loads. For the fridge, a passive cool box is enough for a short weekend. For longer, a portable power station runs the fridge and recharges from the socket an hour a day: the van only pays its 400 W for that hour. The socket switches itself off at the discharge limit set in the van, which keeps enough to drive home.
Measurement to come: the PV5's own self-consumption, socket on and nothing plugged in.
The interior build
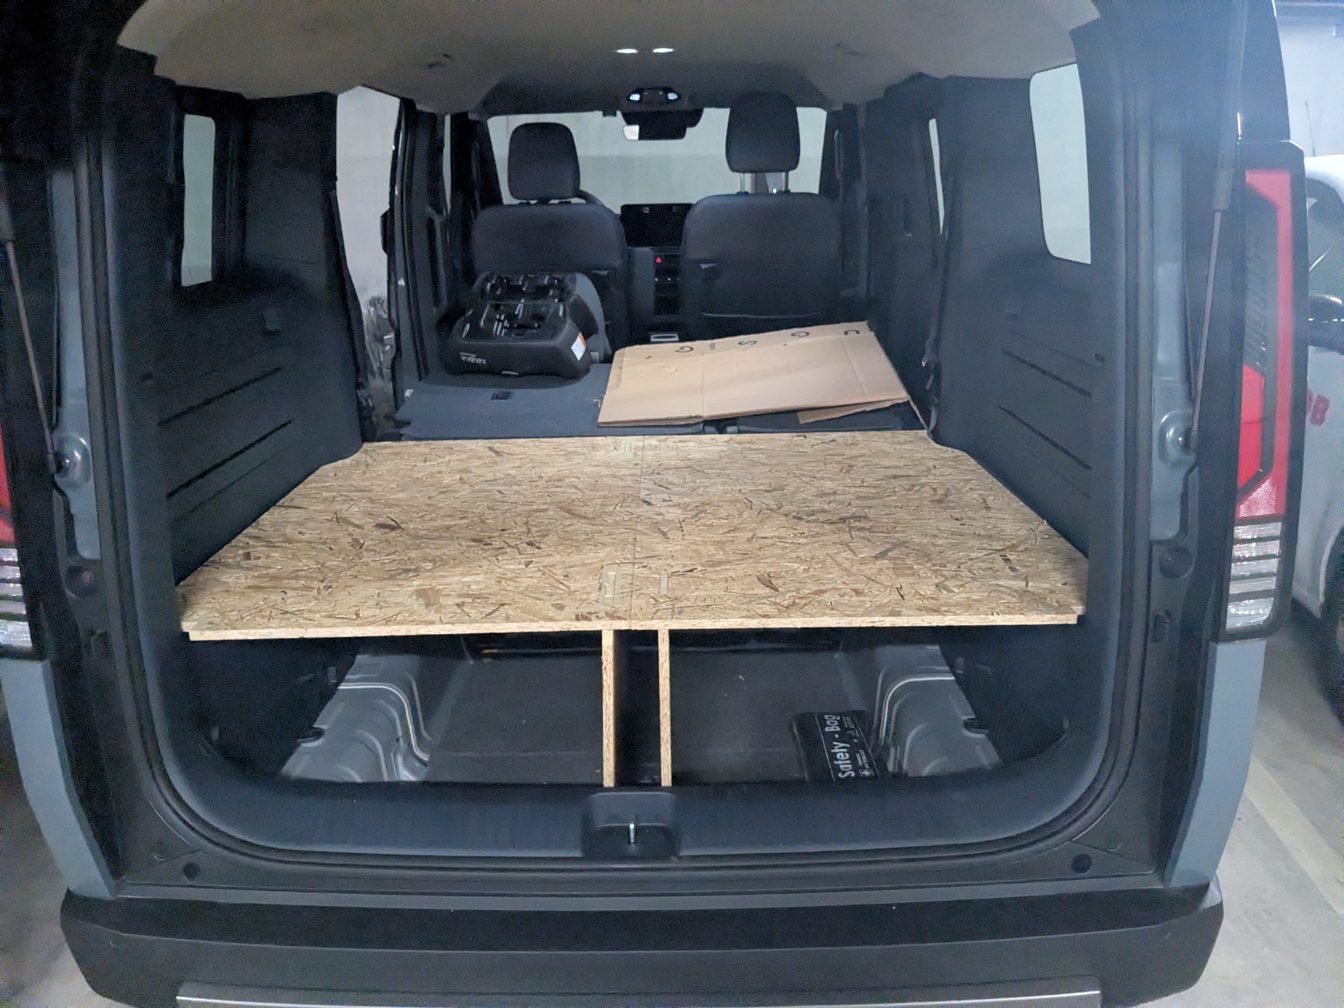
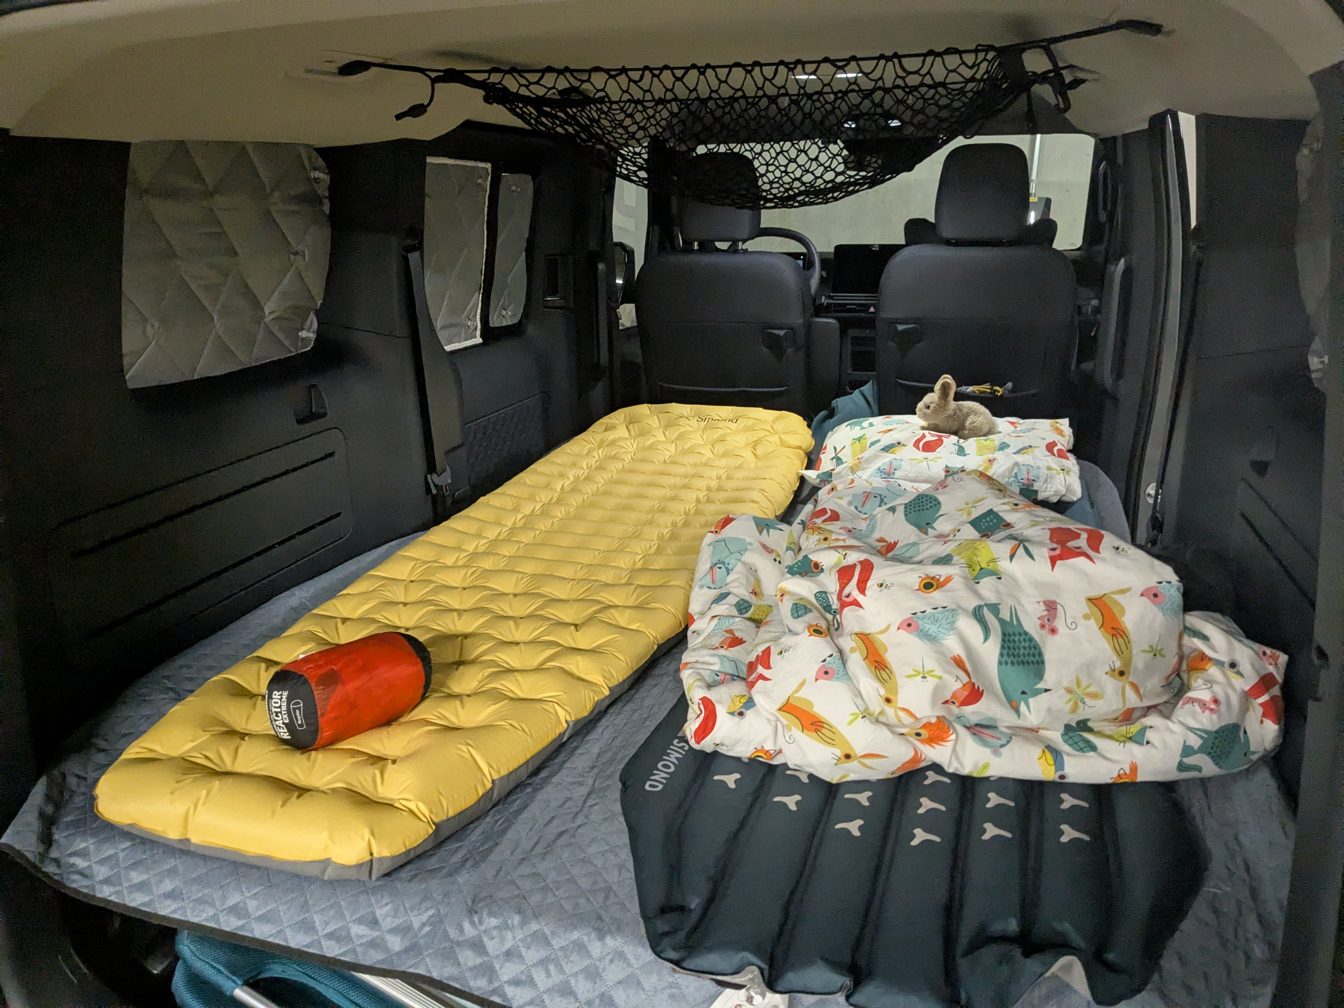
Version 1, deliberately simple and cheap: an OSB bed platform in the boot, rear seats folded, to prove the geometry before making the same parts again in plywood. Underneath, room for the luggage. On top, two inflatable mattresses, a duvet, and insulating curtains on the windows. More photos will follow as the build goes on.
Bed platform: dimensions and cut list
Two 15 mm OSB3 panels side by side, resting on the boot's plastic side frames, false floor removed. A batten rib under each panel and a beam under the centre joint make them stiff: halving the span is worth as much as doubling the thickness, for a tenth of the weight. Every part comes out of a single 2500 × 1250 mm sheet.
| Part | Qty | Size in mm |
|---|---|---|
| Bed panel | 2 | 745 × 1205, then scribed: 640 to 745 wide depending on the spot, steps of 190 and 35 to follow the walls |
| Lengthwise support | 2 | 485 × 1205, trimmed to the height of the frames |
| Ribs and centre beam | — | 40 × 60 spruce batten, about 4 m |
The one thing not to get wrong is the orientation: OSB is two and a half times stiffer along the sheet's length. So the 745 mm span must be taken along the 2500 mm. Getting the orientation right is worth more than going to 18 mm, and costs nothing.
Closed-cell EPDM tape wherever wood touches the van, and 50 mm holes every 20 cm under the mattress for ventilation. Materials and consumables: about 130 CHF, of which 33 CHF for the sheet. The final version, in 15 mm maritime pine plywood, weighs about the same, is much stiffer and has edges that look fine raw, for 86 CHF a sheet.
The front seats don't slide forward, so the bed is shorter than 1.90 m. Off-the-shelf platforms don't escape it: Combe Valley Campers' one for the PV5 is 1380 × 1815 mm. A hinged head extension is the idea for version 2.
Cutting order and build steps
At the store's cutting service, four straight cuts:
- Rip the sheet at 1205 mm along its length, from a factory edge.
- Crosscut the strip into 745, 485, 745, 485: 2460 mm plus three saw kerfs leaves about 28 mm to spare.
In an online cutting configurator, tick the option to respect the grain and enter 745 × 1205, not 1205 × 745: the first dimension follows the grain. Otherwise the optimiser rotates the parts. The supports are cut at 485 mm on purpose: a support too tall can be trimmed, one too short is scrap.
In the workshop:
- Take the boot's shape onto a cardboard template with a scribe set to 30 mm. The point slides along the wall, always kept at the same orientation: if it turns to follow the wall, the outline is wrong in the curves.
- Transfer the template to the OSB, then add 30 mm outwards. Mark the top face and the side straight away.
- Cut with a jigsaw, 1 to 2 mm outside the line, then sand down to the line.
- Try, trim, try again: three or four rounds are normal. Aim for 3 to 5 mm of clearance at the sides.
- Make the second panel as a mirror, using the first as the template.
- Stick the EPDM tape on before the last fittings: it's the finished panel that gets fitted.
- Trim both supports together, clamped face to face, so they come out the same height.
- Drill the ventilation holes, screw on the ribs and beam, sand the edges at 120 grit and soak them with diluted wood glue (one part to two of water) to lock the strands.
Insulating blinds for the windows
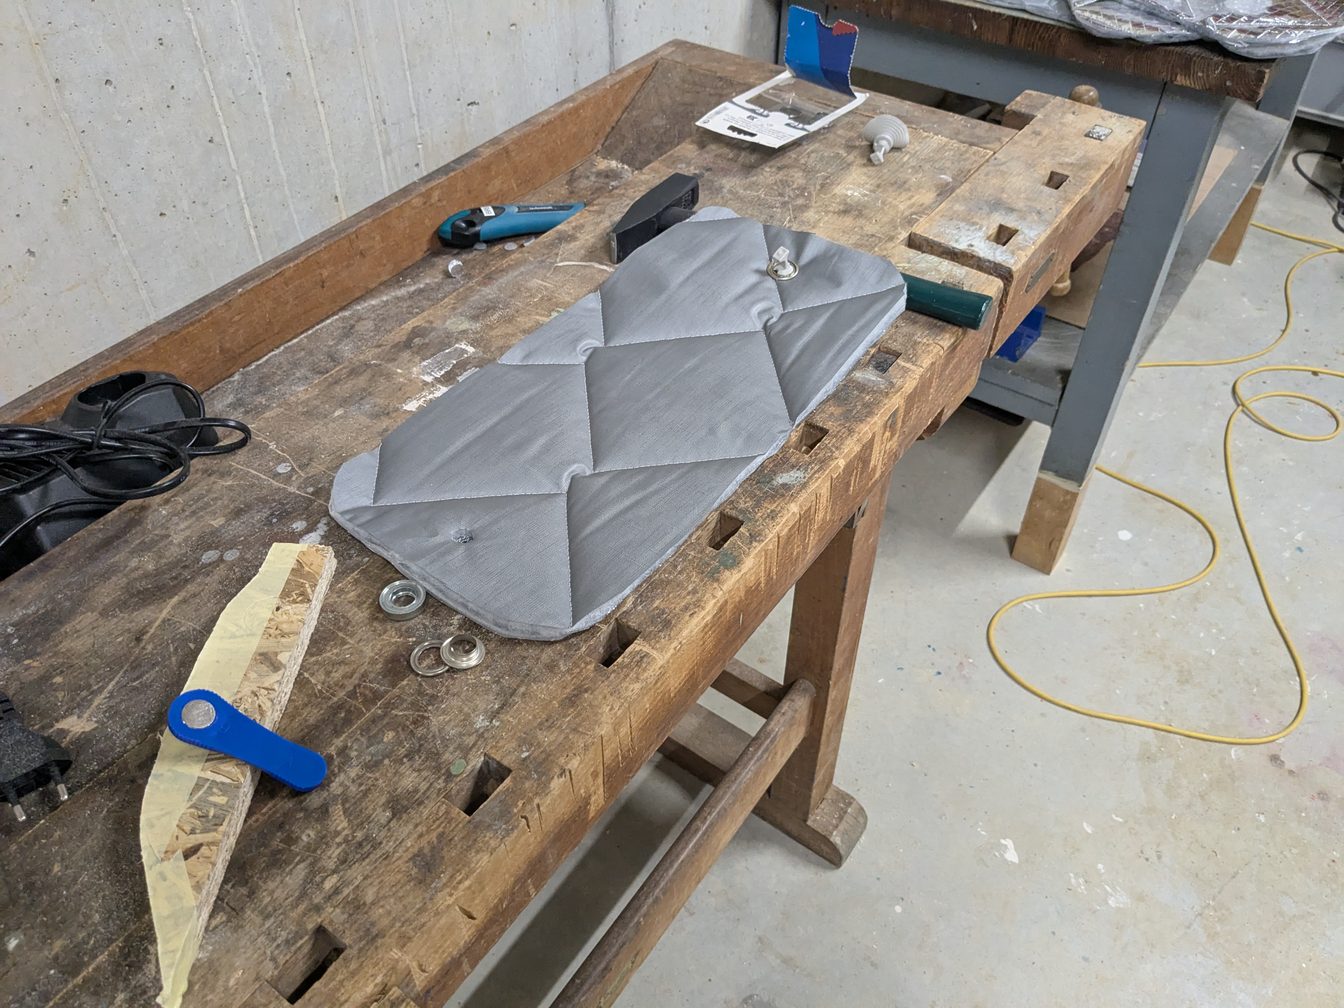
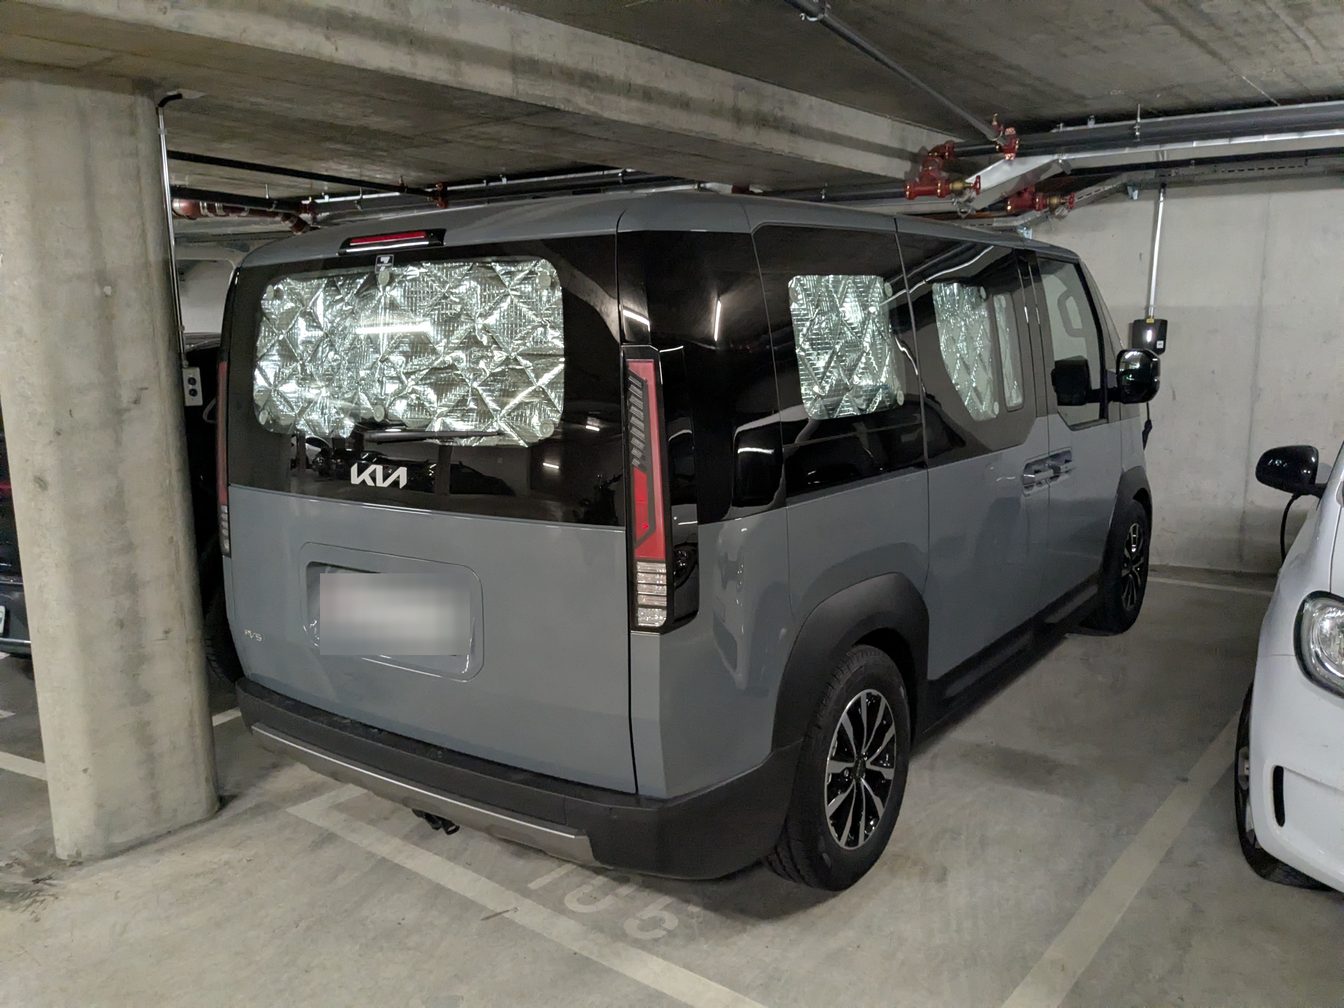
Insulating blinds with suction cups for the rear window and the side windows: they keep the warmth in at night, the sun out by day, and hide the inside. I made them from a do-it-yourself kit, the Carbest 7-layer Thermomatte, about 70 CHF from Camping-Profi. Bought with my own money, no affiliate link.
The kit holds 3.5 × 1.55 m of insulating mat, 30 suction cups, 30 m of edging tape and a plastic sheet for the template. Trace each window onto the sheet, cut the mat, sew the edging tape all round, then fit the suction cups. The 14 mm eyelets aren't included: they go in with a hammer and a small setting tool, sold separately.
Next steps
- Probably fit a pop-top roof.
- Make a paragliding-themed decoration.
- Tint the rear windows, against the heat and for privacy.
- Test nights with the heating on, and measure what they cost in battery.
- Plug in a WiCAN Pro OBD dongle, to read detailed consumption and charging curves.
- Track the battery's health over time. In the field, NMC batteries like the PV5's lose about 2 % of capacity a year on average: less when charged mostly slowly, more with frequent very fast charging (Geotab data). After eight years, you'd expect to keep about 80 % of the original capacity.